Everything about Attendance
Attendance
To use this module, you need to first define the Attendance Type.
Attendance Type
Attendance Type defines the category of each type of attendance available to employees of your company. Attendance Type is available to the user with "attendance:config" permission enabled.
You can filter the results & also perform sorting & ordering by given columns. Users can take print outs, generate PDF or export as excel sheet.
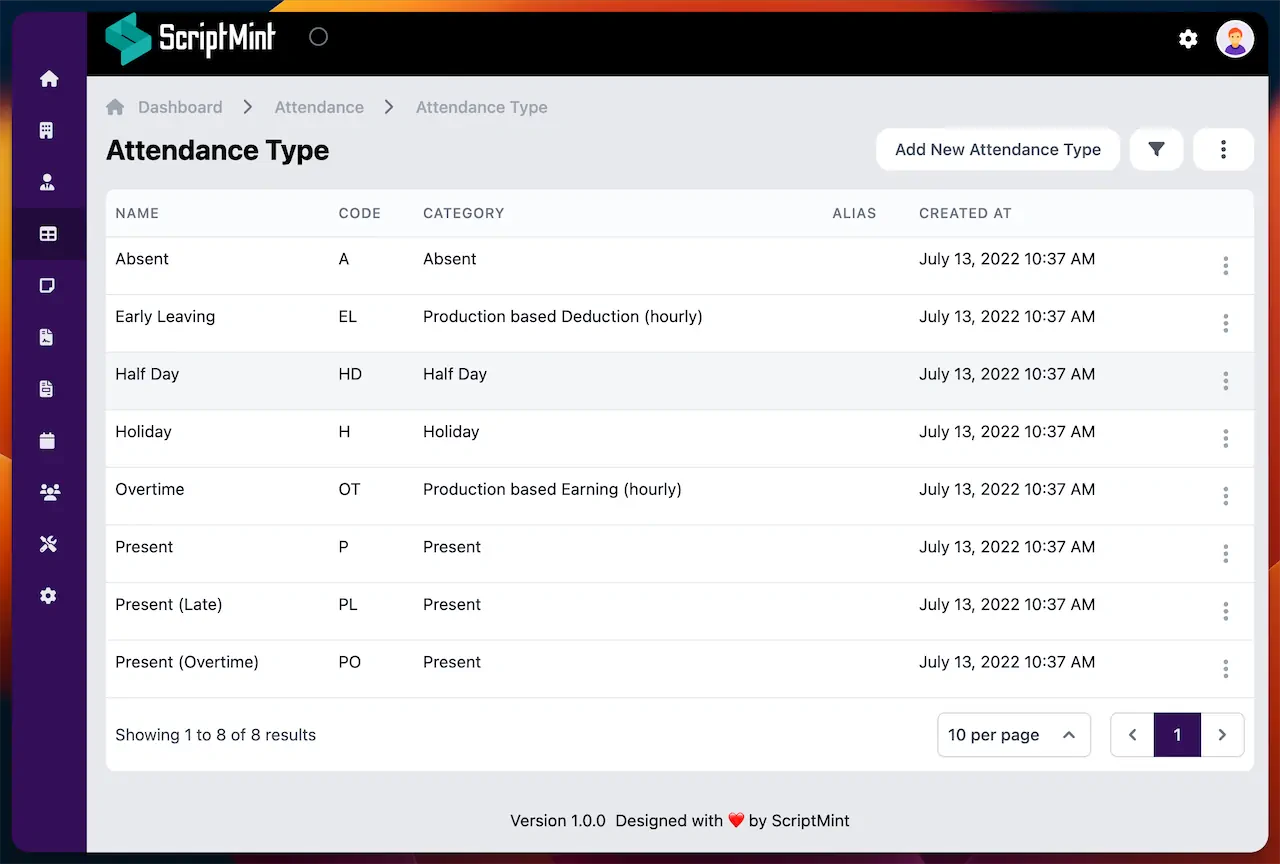
To create new Attendance Type, you can click on "Add New Attendance Type" button. Each Attendance Type has a category from the pre-defined list.
- Present
- Holiday
- Absent
- Half Day
- Production based Earning like Overtime
- Production based Deduction like Early Leaving
You can define multiple Attendance Types for the same category.
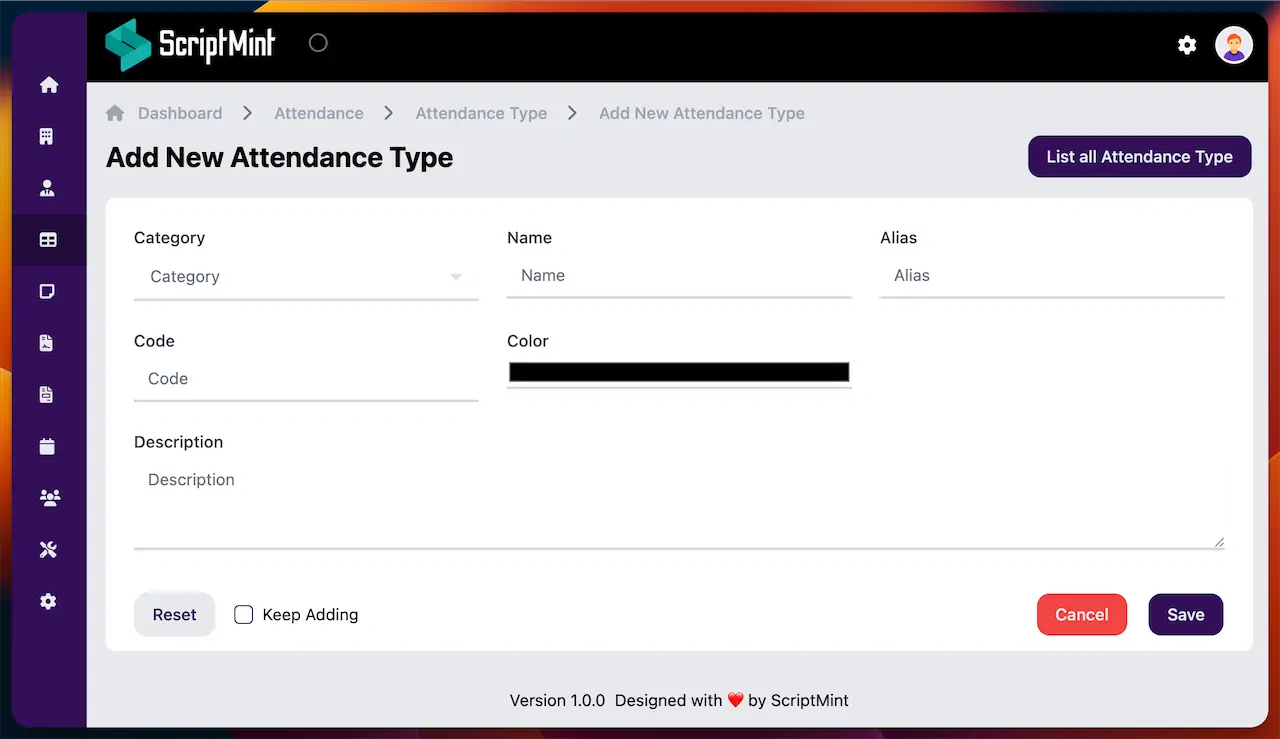
Once you create Attendance Types, you can assign it to your employes.
List Attendance
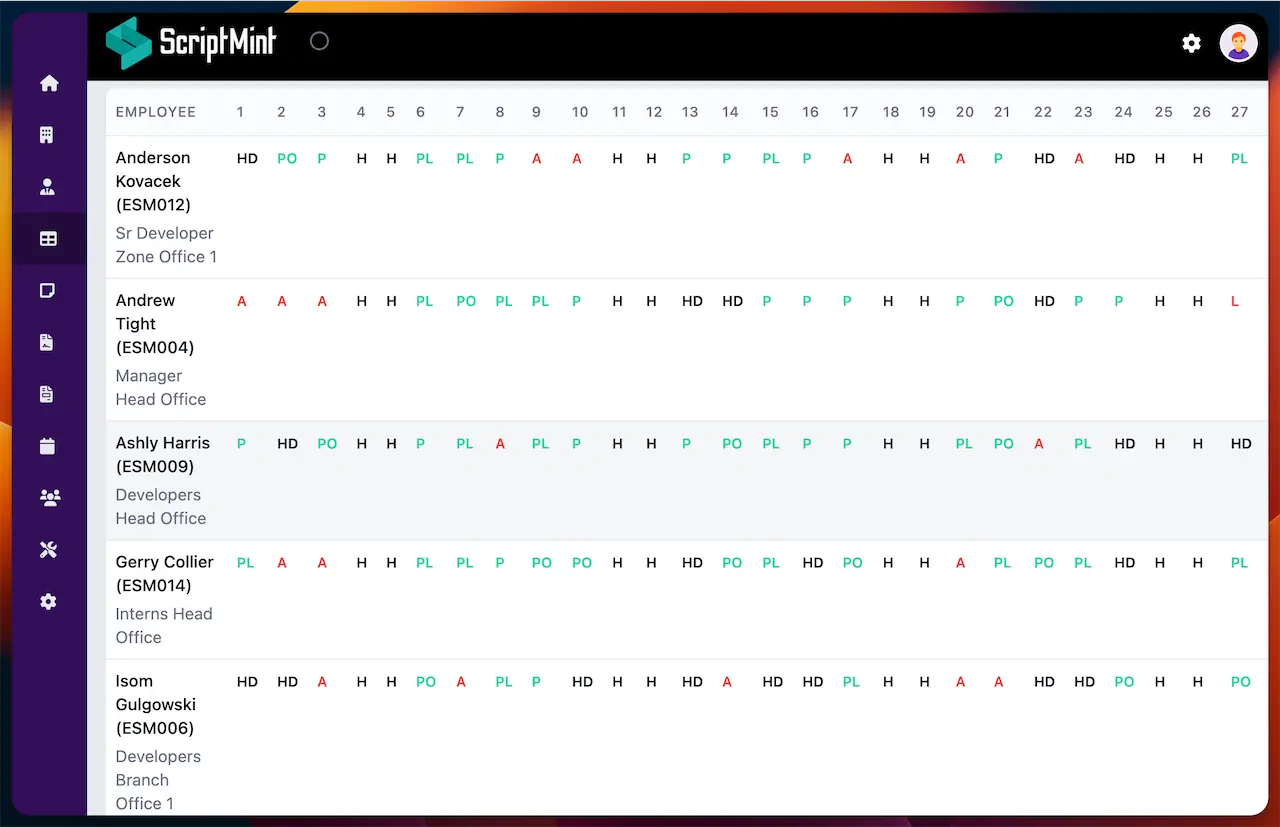
Click on the Attendance menu from the sidebar to get the list of monthly attendance. You need to choose the month of which you wish to get the Attendance Report. You can also select different fields like employee code, departments, designations etc to filter the list of employee attendance.
To get the summary of Attendance, Turn off the "Day wise Report".
Available Permissions
| Name | Action |
|---|---|
| attendance:config | Config Attendance |
| attendance:read | List Attendance |
| attendance:mark | Mark Attendance |
| attendance:export | Export Attendance Report |
Mark Attendance
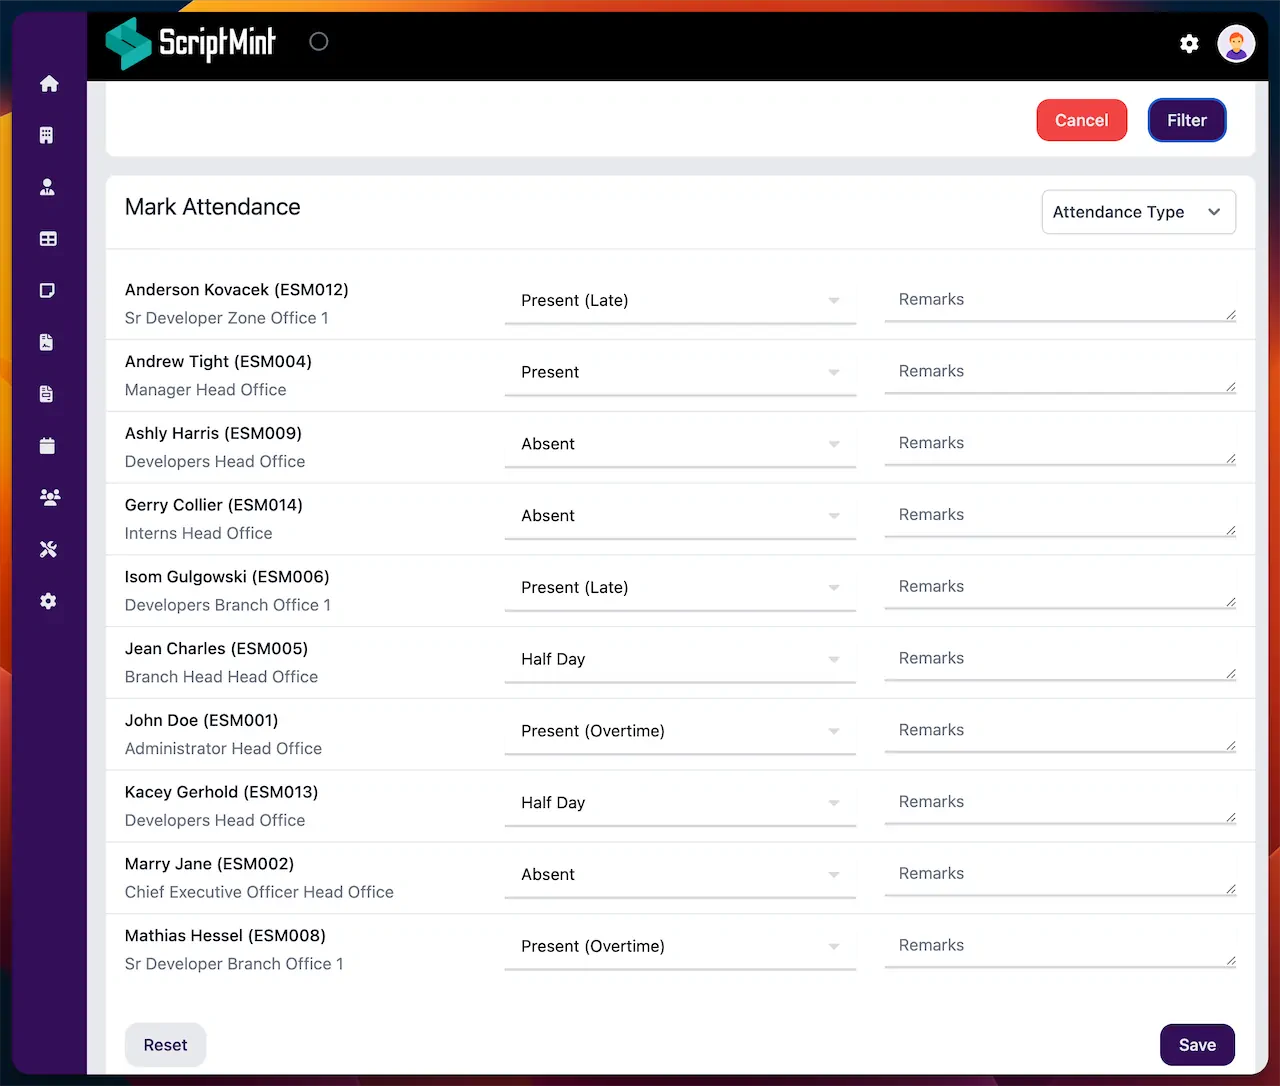
To mark attendance, click on the "Mark Attendance" button. You will need to select the date of Attendance to get the list of employees.
Select the attendance type for each employee and click on the save button to mark attendance. Please note that attendance will not be marked for the employee whose leave request is already approved for the given date.
Also if the date is marked as Holiday, you will get the attendance type as "Holiday" for all the employee.
Mark Production Attendance
If you have defined Production based Earning or Deduction Attendance Type then you will be able to mark Production based Attedance.
Click on the "Mark Production based Attendance" and select the Employee & Date for which attendance to be marked.
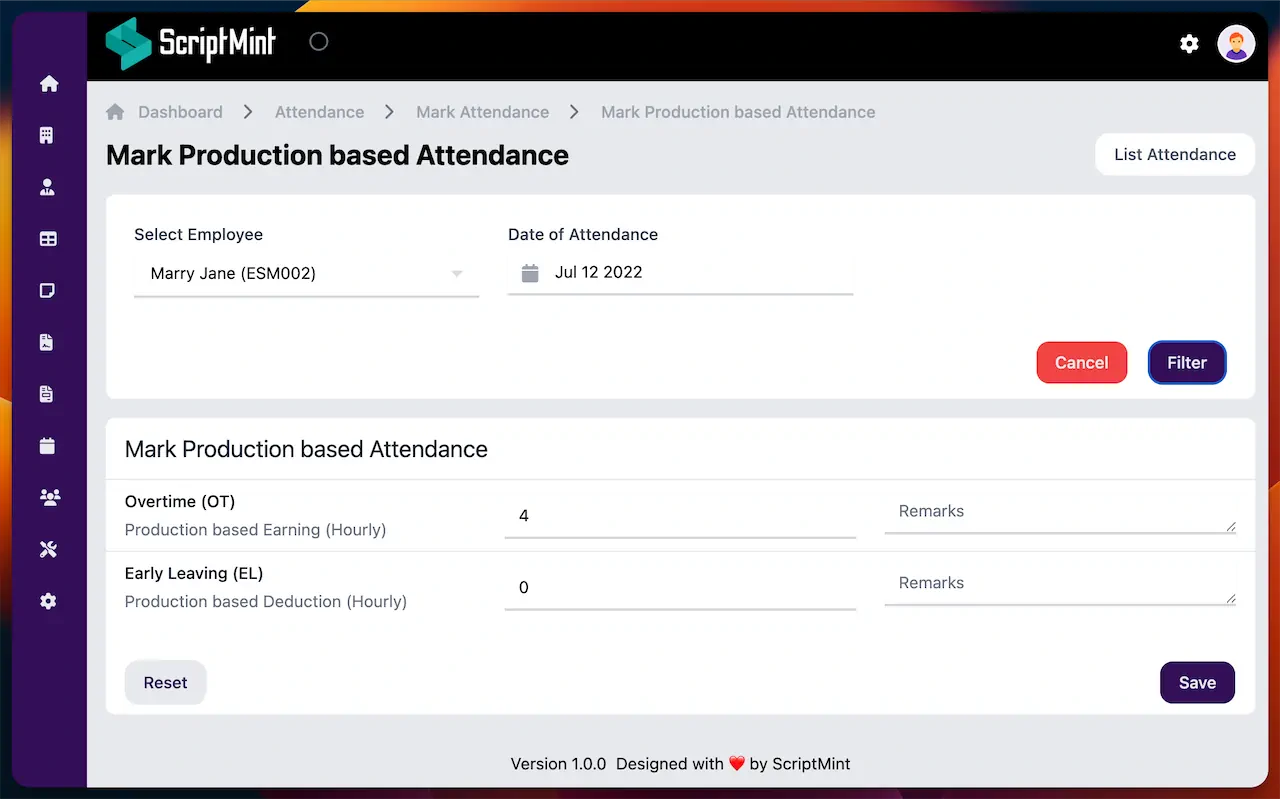
You must have marked the attendance for the date for the employee else you won't be able to mark production based attendance.
Enter the hourly count of production based attendance which will be used to calculate Payroll for the employee.
You can update the attendance until you generated payroll for the employee.
Work Shift
Work Shifts are the durations of time in which employees are expected to work. You can create multiple work shifts for your employee and assign them to different employees for different period.
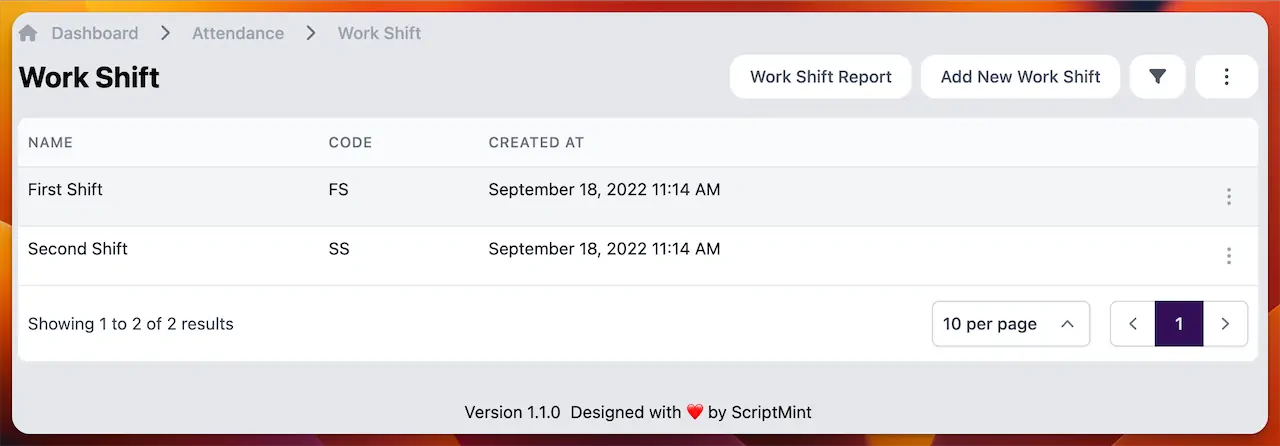
Available Permissions
| Name | Action |
|---|---|
| work-shift:read | List work shifts |
| work-shift:create | Create work shifts |
| work-shift:edit | Edit work shifts |
| work-shift:delete | Delete work shifts |
| work-shift:export | Export work shift list |
To add new work shift, click on the "Add New Work Shift" button.
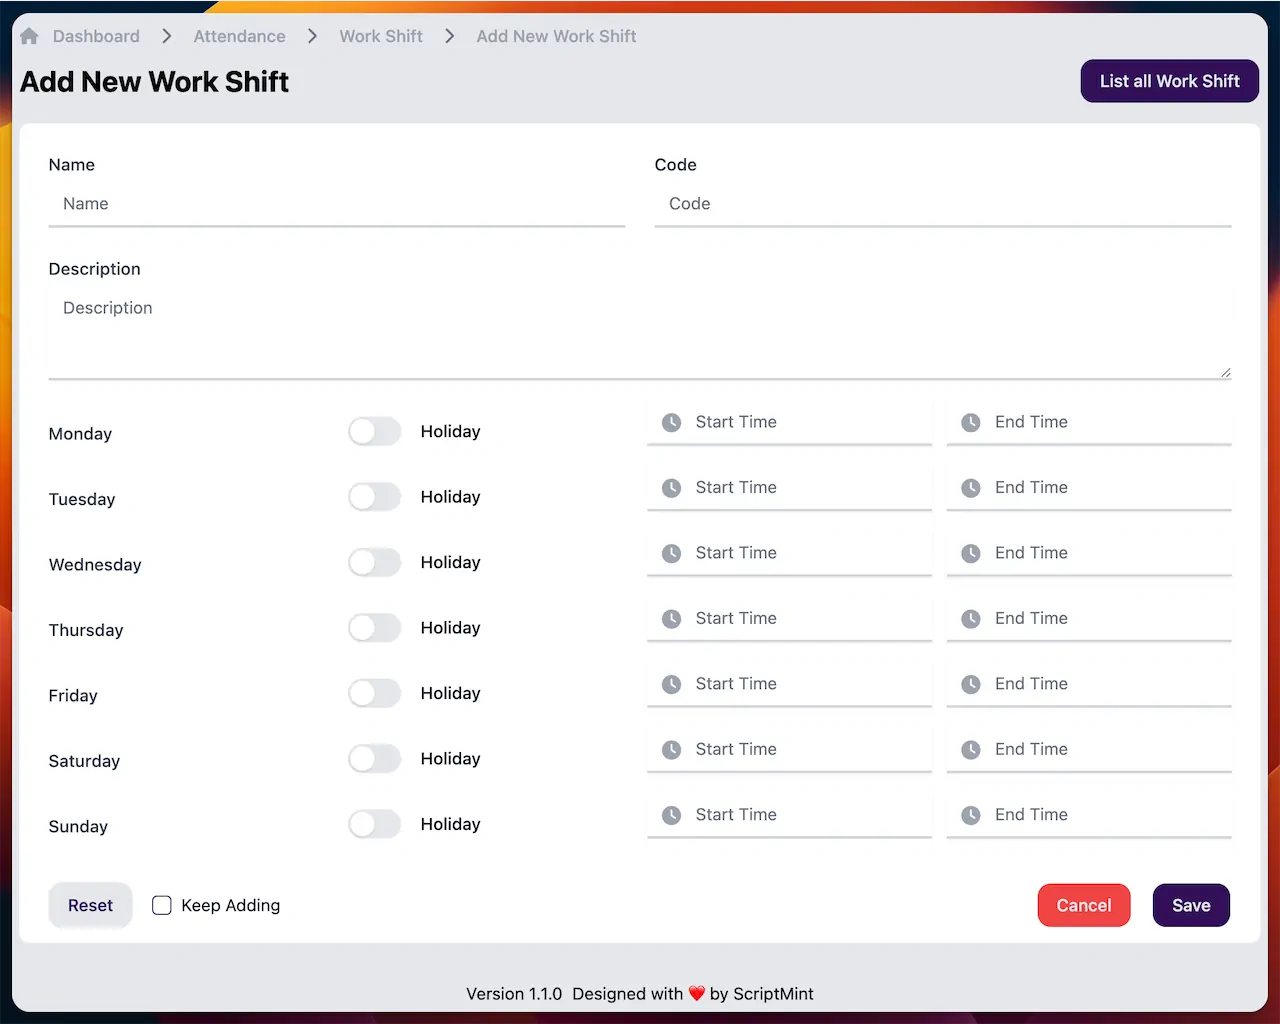
Once created, you can click on the show button and get the details of the work shift.
To assign new work shift, click on the "Assign Work Shift" button and select the date range along with the other filter option.
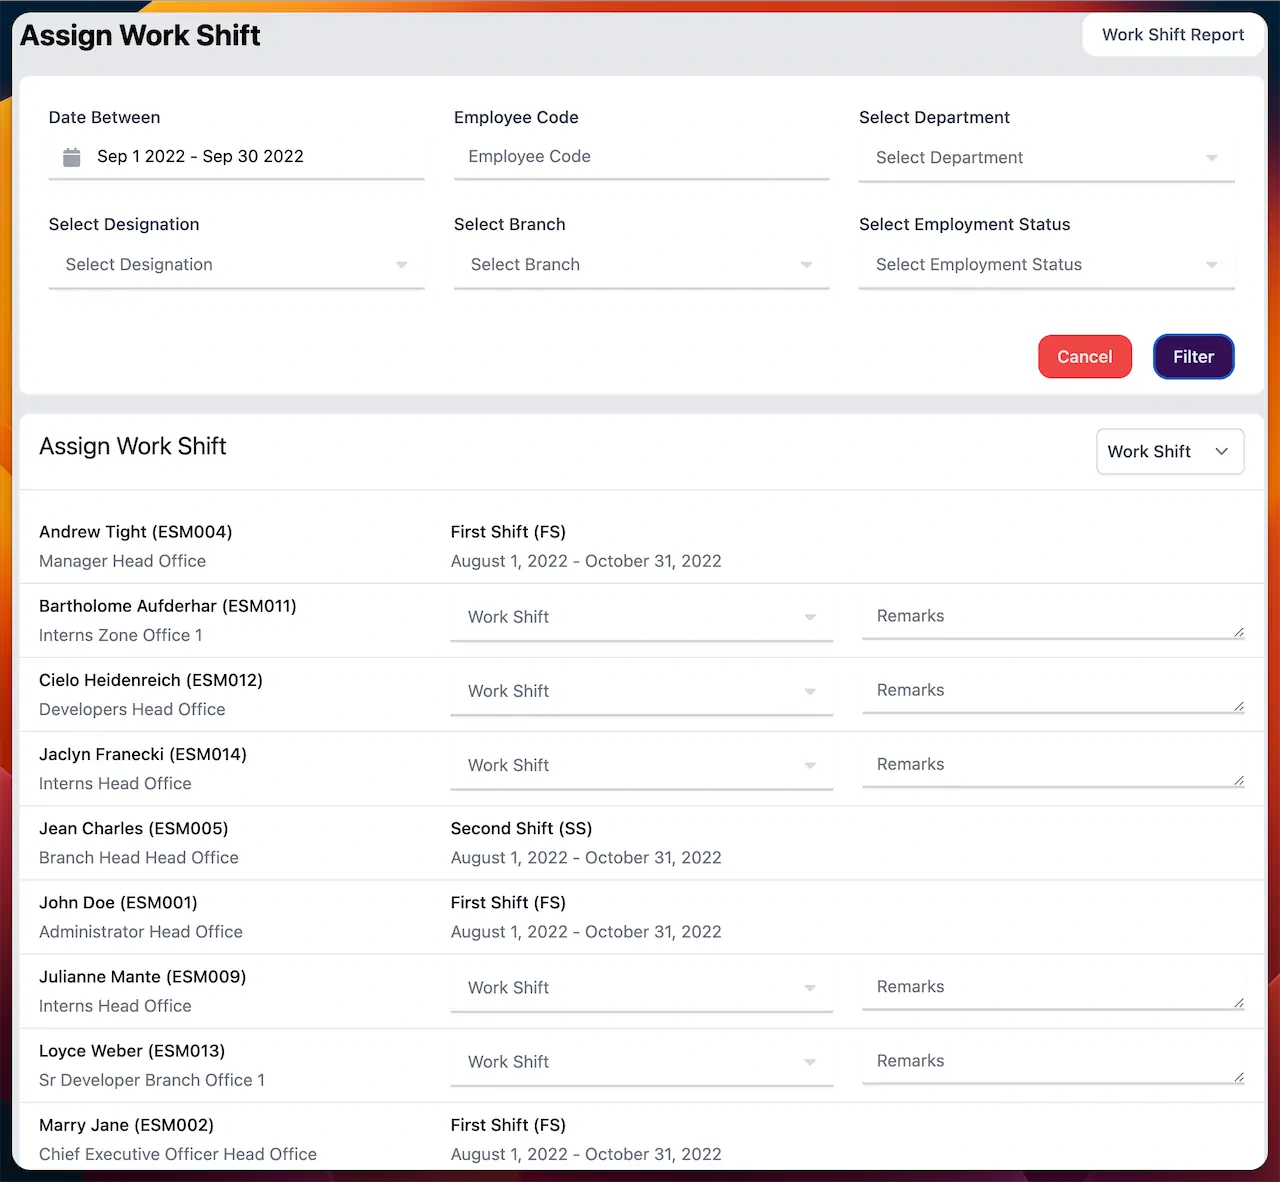
Timesheet
Timesheet is the record of employee's attendance for a particular day. There are four options available which you can use to store timesheet of employees.
- Manual Timesheet - You create/edit/delete timesheet for individual employees manually.
- Employee Self Clock In/Out - Employees can click on the Clock In & Clock Out button to mark their timesheet.
- Import Timesheet - You can bulk import all the timesheets of the employee at once.
- Biometric Attendance API - You can use API to integrate biometric device to mark employee's attendance.
Available Permissions
| Name | Action |
|---|---|
| timesheet:import | Import timesheets |
| timesheet:sync | Sync timesheets |
| timesheet:create | Create timesheets |
| timesheet:edit | Edit timesheets |
| timesheet:delete | Delete timesheets |
| timesheet:export | Export timesheet list |
To store timesheet with Biometric Attendance API, you first need to add device by navigating to "Device" menu from the header.
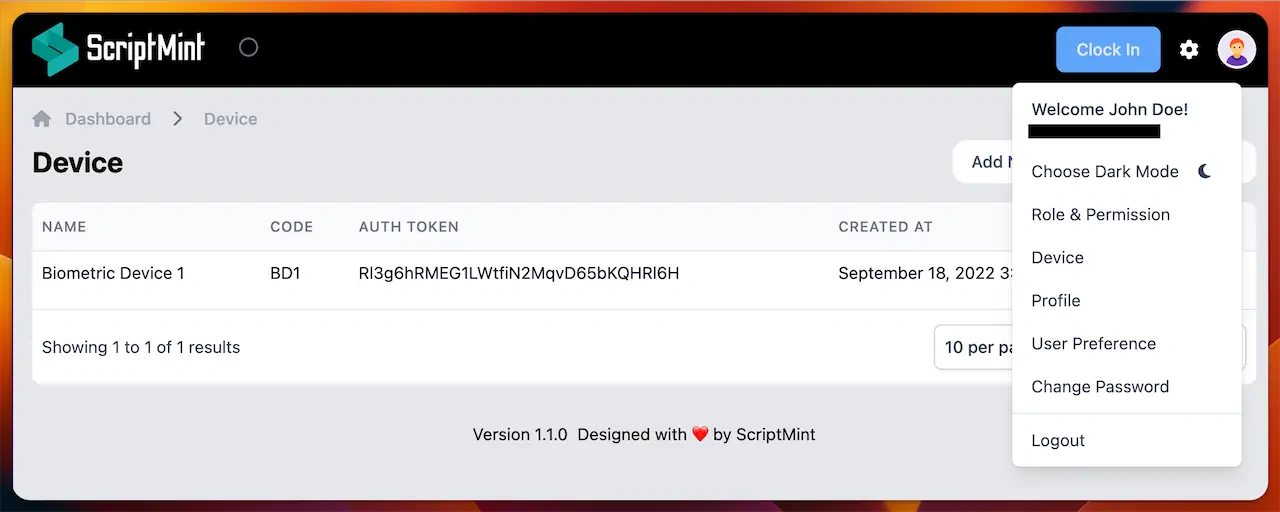
You can then send POST request to following API:
/api/v1/timesheet
The form data should be in following structure:
{
    employee_code: '',
    token: ''
}
The script will automatically mark the date & time of attendance.
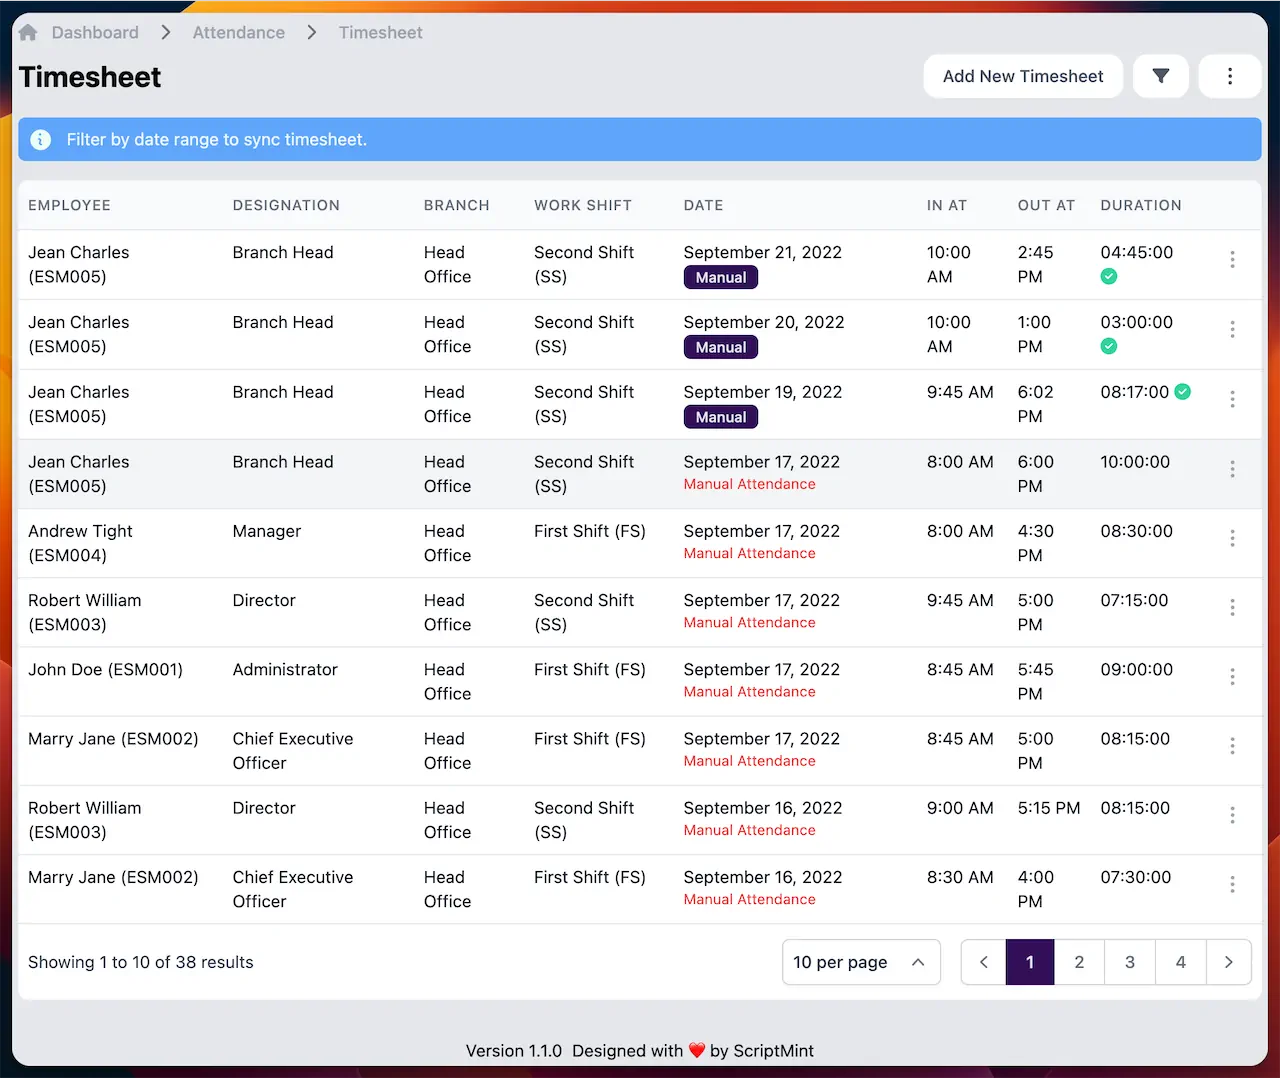
Once timesheets are stored, you can click on "Sync Timesheet" button to sync it with attendance. Timesheets marked with green check icon are successfully synched with the attendance. However, the small red error lables are indicating the reason of not able to sync with the attendance.
Newsletter Subscription
Subscribe & get latest updates from ScriptMint
